FFA223- PHOTO IMPOSING
On our next class, we learned on how to make a photo impose by add another layer of photo to create an interesting design to the picture. Miss Sheila gave us this picture of little boy and edit it using Adobe photoshop. Then, Miss sheila teaches us on how to remove the background of the picture with few types of lasso tools. We just need the boy's figure only then we create a new design by add another layer and another pictures.

After we've done our exercises, we need to do it on our own using our own pictures. This is the result.


This is the picture of the boy before I edit it.

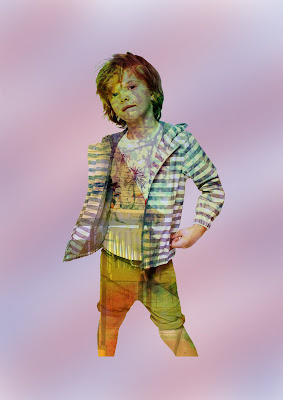
This is after I edit the picture.
After we've done our exercises, we need to do it on our own using our own pictures. This is the result.

These are the progresses :

First, I remove all of the background using lasso tool.

After that, I create another layer and fill it with black color using bucket tool.

Then I add some colors to another layer using brush tool.

And I insert a picture that I took with my phone and create it as an overlay. It is an image of flowers that I took at a garden.

For background I just made a circle using elliptical marquee tool and fill it using brush tool, the brush looks like leaf so it would be interesting to use that kind of brush for the background.

Finally, i add a soft pink to the background.
The picture that I took to use it for the overlay :

The reason I dont add another photo to create another overlay is that it seems to be a little too much. In a conclusion, it was fun to learn on how to edit photos using photoshop especially when editing my picture and made it unique and beautiful.


Comments
Post a Comment